Ideas for Teaching STEM utilizing a 3d Pen in Homeschool

My son is fascinated by all things STEM, throw in art and he’s over the moon excited. Which is why I’ve been working to figure out how to utilize a 3D pen in homeschool to encourage his active mind to explore STEM in many aspects.
No doubt my son is fascinated by engineering, which means that science, technology and math are at the forefront of his mind throughout the day. Oh, he’s not specifically separating out those various fields in his mind, to him, all are necessary when engineering anything.
Take Da Vinci for example. His notebooks contain hundreds of sketches that encompass science, technology, engineering and math in all of his designs and shows that all are integral in the functionality of the various things that he designed, from simple machines to architectural designs. That’s how my son’s mind works. He just sees it.
I received the iDo3D Vertical pen kit for free in exchange for this review and am being fairly compensated for my time. All opinions expressed are my own and I was not required to write a positive review. As with all posts at Great Peace Academy, this post may contain affiliate links to 3rd party sites.
Using a 3D Pen in Homeschool

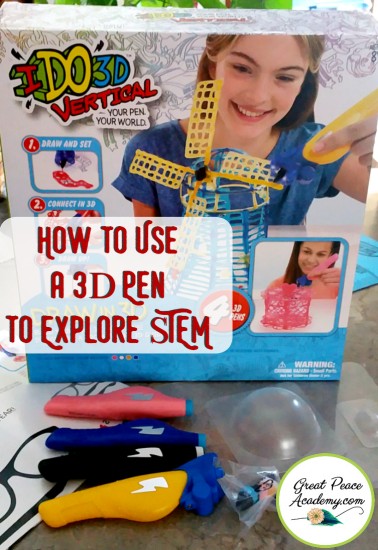
The iDo3D Verticle Kit is sure to inspire creativity. It is a fun that can be ready to go in just a few seconds.
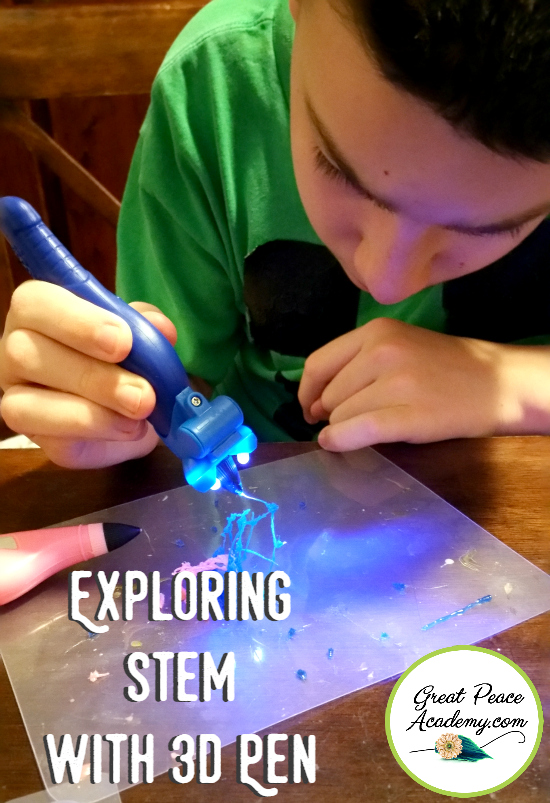
- Insert the pen into the light attachment.
- Be sure to give it a good push until it snaps into place.
- Turn on the light and you are ready to go.
- Gently squeeze the pen so the ink comes out in a steady stream.
Go slow, especially when the light is on, but not too slow. Too slow with the light on and the ink will harden faster than you want. Go too fast and it won’t have time to harden. It takes a bit of practice to get the hang of it.
You can also draw a line flat against the plastic and even flood an area between lines while the light is off to get the design you want, then you can turn the light on and slowly hover over the shape to cure the ink. Doing this provides a good way to create a solid design.
This kit comes with 4 ink colors, the light attachment, a handy plastic sheet to draw on and a guide sheet, but you can totally create your own creations. The guide sheet is a good way to get started and build confidence. It also came with a couple of curved plastic guides which make it easy to make domes, eggs, or globes.
Just remember as with any art form it takes practice to learn how to make the most of the tools. Encourage your kids to be patient, stick with it and let their creative imaginings flow.
Check out some of the amazing creations that have been made with iDo3D Verticle.
We found that when doing flat work it was good to leave the light off, then go over it holding the light just above for a moment or too. This way we could get the shape we wanted for the base, then build up from there.
It’s a good idea to keep some handi-wipes or damp paper towels on hand to wipe off sticky fingers or even the tip of the pen on occasion.
About the iDo3D Art Pen
This pen utilizes a special proprietary ink that hardens under a u.v. light. Don’t worry, the light is a low-temp so no risk of burns for little hands. It’s totally safe.
Included with the iDo3D Art Verticle Kit
- 4 Ink
- 1 U.V. Light Attachment 3 LR44 Batteries included (installed).
- 1 plastic sheet
- 2 plastic molds
- 1 template page with instructions for designs
Finding More Ways to Be Creative with iDo3D Art Pen
iDo3D & AtmosFlare have teamed up to offer FREE 3D Art Classes, plus tips and tricks for 3D Art Success. Plus, be sure to follow iDo3DArt on your favorite social media channels for regular tips, ideas and inspiration.
15 Ideas for Teaching STEM with a 3D Pen in Homeschool
S – Science, T – Technology, E-Engineering, M-Mathematics
While this 3D pen is an amazing tool for creating fun, 3D art sculptures, it also can be utilized to prompt other areas of learning in the homeschool.
A 3D Pen can literally put technology in the fingertips of a child. Putting anything into a hands-on study allows a child to actively think about what they are studying. By using a 3d pen to build models, diagram systems, or as a basis for scientific research such as a study of u.v. light, composite materials, and more, you will inspire a student to learn in a kinesthetic way.

- Use the 3D Pen to build molecular models.
- Use the 3D Pen to create diagrams of anatomical systems; build the respiratory system, build bones, diagram the circulatory system.
- Diagram the water cycle.
- Research U.V. light.
- Model the reproduction of a plant.
- Research the composite materials being used in the technology such as; polymers, resins, and carbon-fiber epoxy.
- Research how 3D Pens are being utilized in the medical field.
- Diagram geometrical shapes, angles, and arcs.
- Build simple machines.
- Explore engineering by diagramming building, bridges, and towers. Encourage students to think about foundations, bracing, cross-bracing, angles and more.
- Build a model of a cell.
- Diagram the solar system.
- Utilize the 3D Pen with other materials such as building bricks, building rods, wheels, and robotic components.
- Using string, build an astronomical model of the planets.
- Model a strand of DNA.
IDo3D Verticle Kit Giveaway
3 winners will receive an IDO3D Vertical kit. Just enter your information below to enter the giveaway.
There is little doubt that putting a 3D Pen into the hands of a child is fun. The creativity it inspires is incredible. But, when you think outside the artistic aspect of utilizing this 3D pen and consider the scientific and mathematic implications of the technology the learning possibilities are endless.

You May Also Enjoy


2 Comments
R G
What an awesome product. Thanks for the ideas… and of course the giveaway, ’cause, I hope I win.
Renee Aleshire Brown
Oh I’m so glad to hear that your inspired by the pen. Good luck.